
Like, the ones electric guitarists tend to use to put their little effects pedals on. Even though I’m not really a guitarist, although I do have a lot of guitars (and even more little effects pedals).
Why?
So ever since I won this fancy tube guitar amp in a raffle, I had been combining it with pedals. Those I already had, and some of them I got anew. They usually sat on the floor in the Spielzimmer, and when the place was needed for something else, I needed to disconnect, store away, and later retrieve and reconnect everything. Which was silly. So my user story was kinda „I wanted to be able to move it away and return it quickly“.
Which also means no gigging, road use, whatever.
What, exactly?
I’m not going to discuss the pedals I’ve chosen or how they are wired – this is something for another post (that I may or may not do in the future). It’s about assembling the pedalboard.
Pedals Revisited
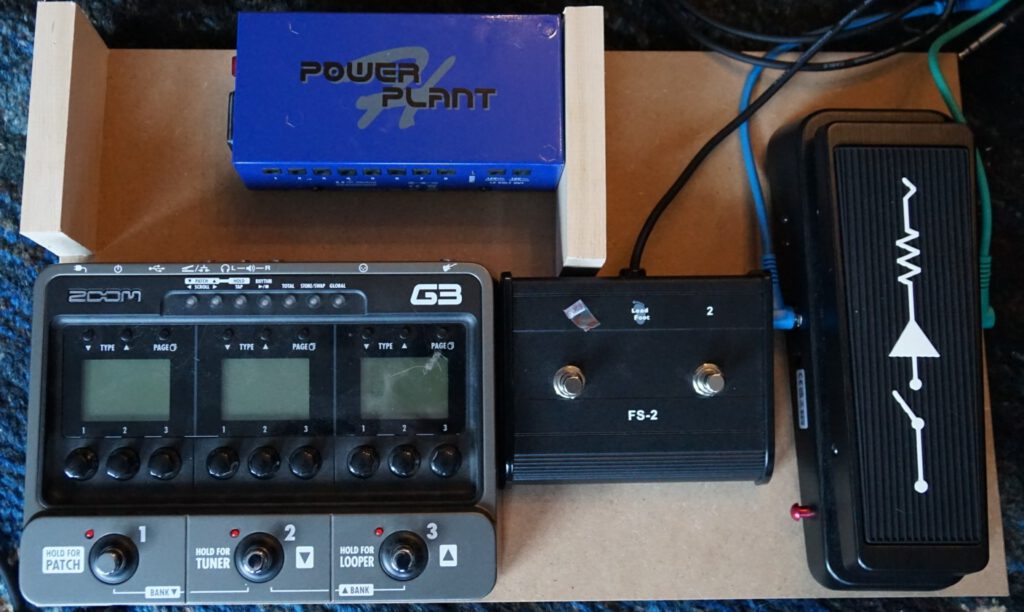
So what goes onto the board? In no specific order a Dunlop/Bradshaw MC404 (huge thing), a Behringer UM300 (Metal Zone Clone), a HB Dual Loop Switch, a Leadfoot FS-2 footswitch for the amp, a Zoom G3 multifx thingie, and, my latest acquisition, an Empress ParaEQ Deluxe Mk.2. And a PSU to go with those – as I would like to keep the Cioks DC7 ready for more demanding jobs, it was the HB Powerplant. No isolated outputs, but it does the job here.
1. „Make or Buy“?
Once I knew which pedals I wanted to assemble how, it was time to decide if I would just buy a readily available pedalboard – or build one myself.
Having started to look at readily available products, one of the makers (Nux) kindly pointed me to Pedal Plaground – a website where you can put pedals and pedalboards on the screen and move them around. They have a database of existing products, and you can also do your own generic boxes.
And after some looking around, I came to the conclusion that what I’m after is not readily available – the combo of a very long (MC404) and relatively large (G3) pedal made it hard to find something, and the space I needed was just below the typical midsize but below the typical large size.
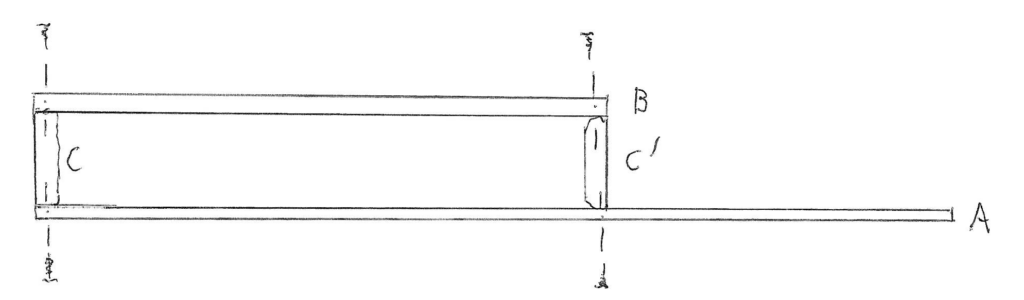
2. Design: it’s Two-Tier!
To get the bulky PSU out of the way, I did consider a two-tier approach. How to do this? As my approach was to use readily available parts and build in a way that I can somehow manage myself, here’s what I thought: two boards (one smaller than the other), and two-by-fours on each side of the smaller to support it on the ground plate.
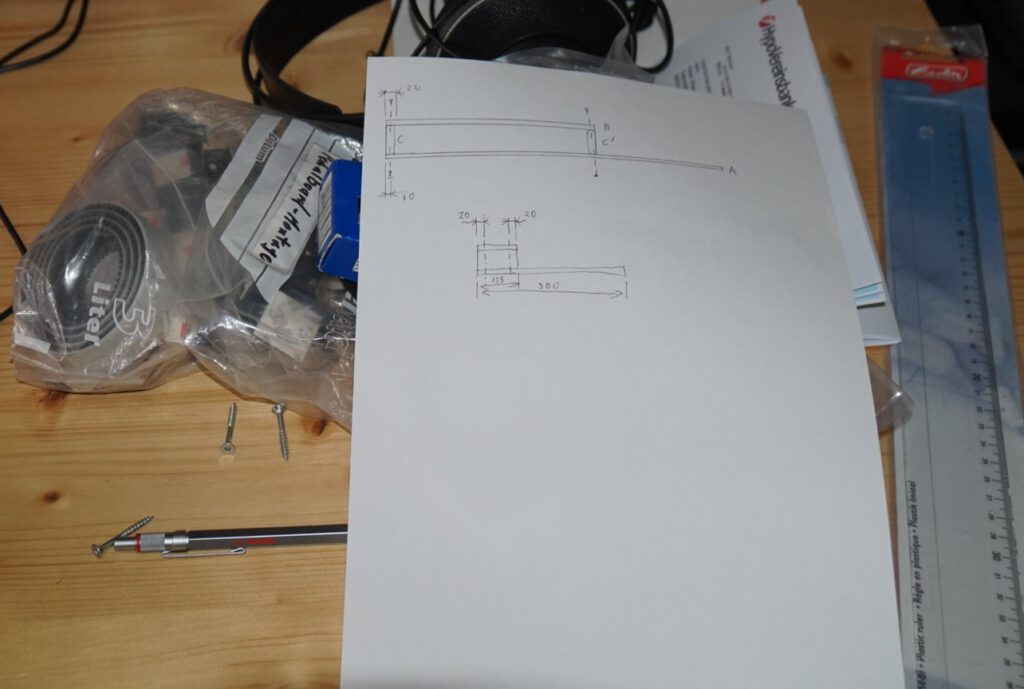
Considering the sizes I needed for both boards (which I got from the mockup in Pedal Playground, which I refined with the actual pedals with their cables), I ended up with this Zusbauzeichnung:
So it was time for a trip to the hardware store.
I bought the boards (10mm MDF) cut to size, and got a fitting 2-by-4 (not cut to length – which meant work). I thought I still had the fitting screws, so didn’t get any.
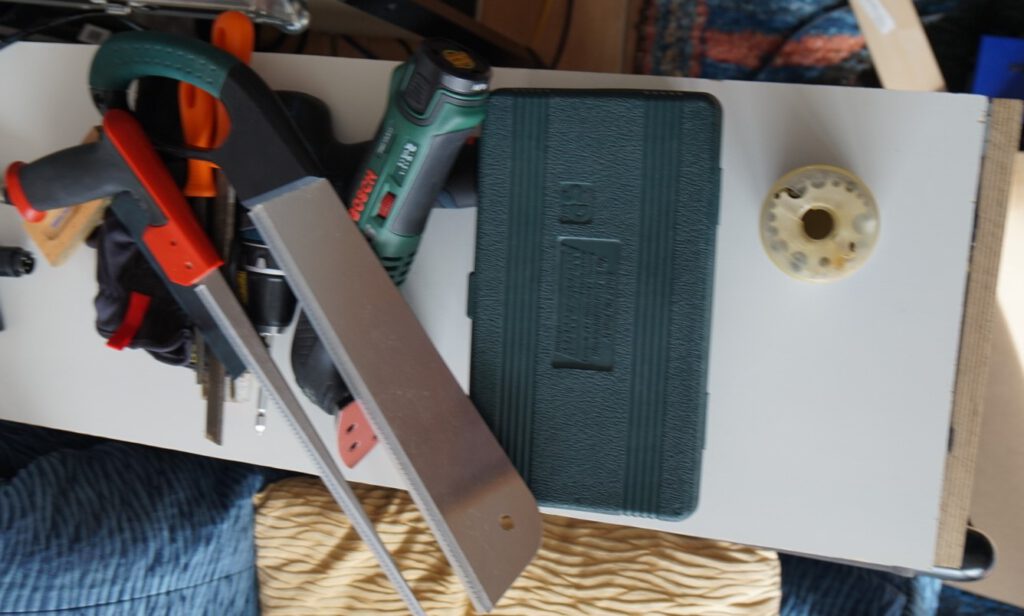
First, I assembled the parts, small parts and tools in the Spielzimmer.
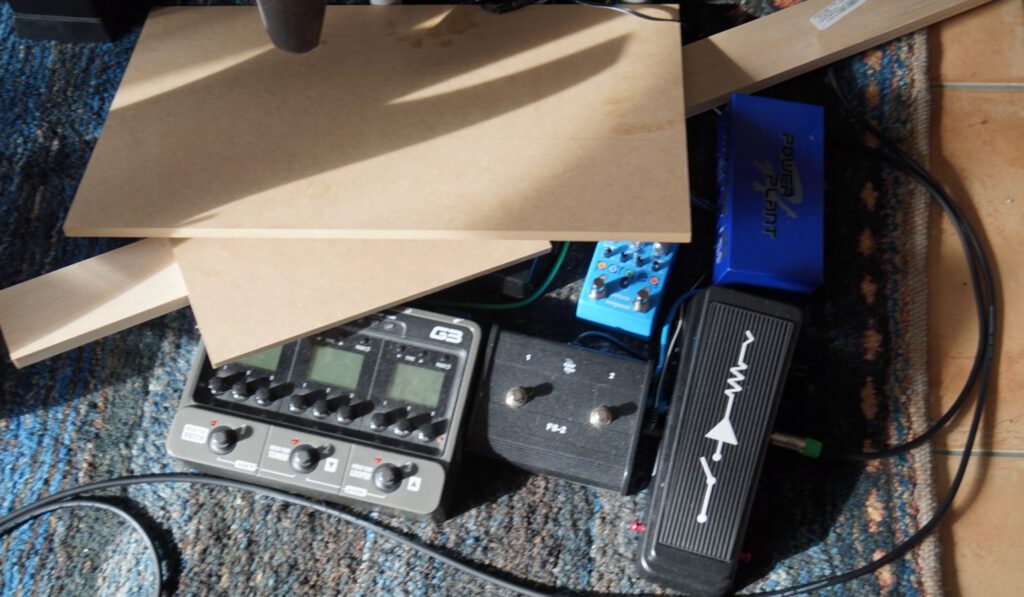
Next up: cutting the 2-by-4 to size. And after cutting the first one, I realized it didn’t fit the design – mistake on my behalf. So it was a total of three parts I had to cut down.
I then assembled the lower tier. Screwing the walls to the board, and then putting the pedals (and PSU) into place. Fits nicely!
It’s a good as time as any to nag about the wah pedal. Now this is (for what I was after) the nicest wah pedal I’m aware of – but the wobbly plate, not-easily-removed rubber pads make this a non-perfect mechanical experience. Next time, I’ll find a different solution without relying on this maker.
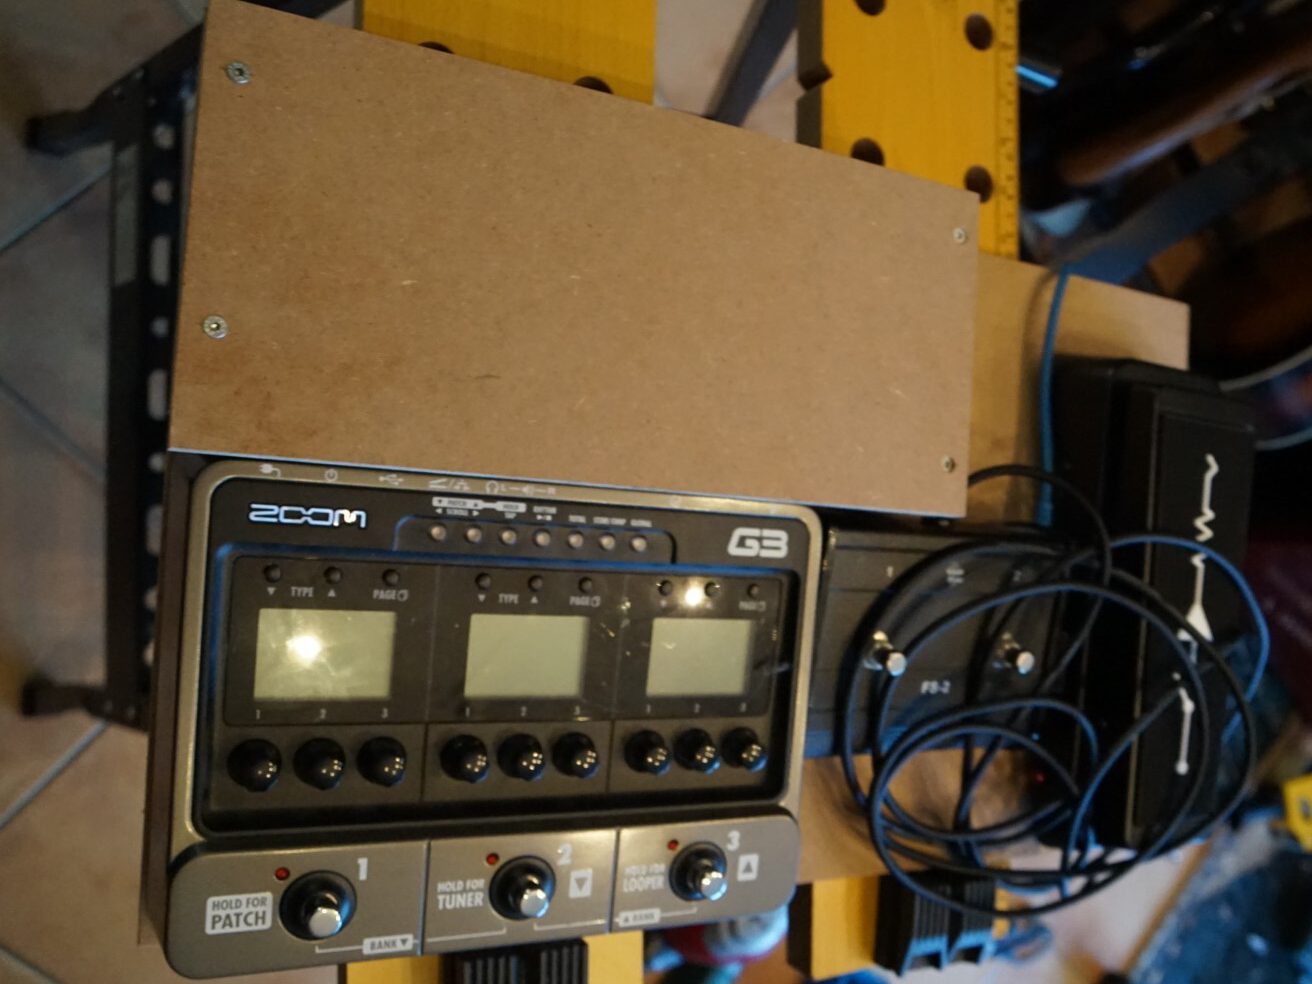
Now for establishing tier 2 – that worked pretty flawlessly.
And now the same pedal DualLock exercise for tier 2.
Add cables, and prepare for first firing…
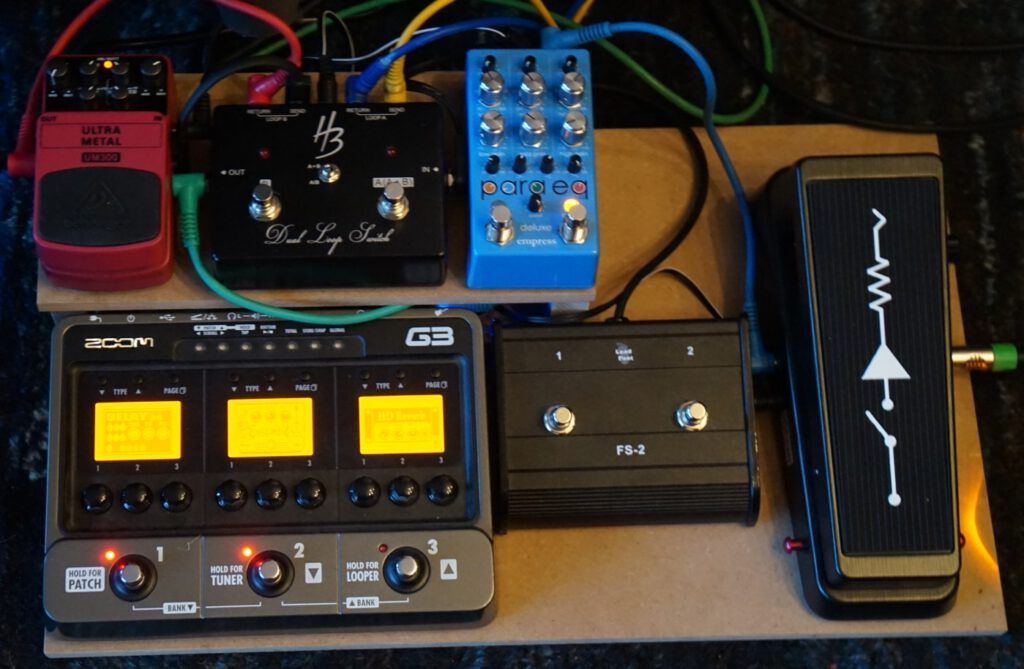
And Done!
Experiences
Repeating myself: this is not about the sound or pedals, rather about the geometrical integration.
To keep it short:
- I confirmed that I can quickly put it in front of the guitar cabinet (which is below the A-100 Mothership, which is out of the way) and back. So: mission accomplished.
- Some of the available cables are not exactly the right length. If I ever turn this into a pro design, I need to change this.
- Angled power cables only available here with the angle in the wrong direction. Pity. There’s a workaround (flipping the PSU).
And it works really well with my entangled loops, additional three channels and whatnot. Great pedalboard! Although the Line6 M9 would be nicer. But all of that is, as they say, another story.